This solution article will describe how the bed and both printheads can be calibrated manually on a Leapfrog Bolt and Leapfrog Bolt PRO.
Leapfrog Step 1: Dropping the bed downwards
- Drop the bed down to the lowest position by tightening all four knobs

Leapfrog Step 2: Loosening both hot-ends and tightening the right hot end.
- Loosen both hot-ends by using Allen wrench size 3
- While pushing the hot-end upwards, tighten the corresponding screw (2Nm). Do this only for the right hot end.
The left hot-end will be tightened in the next step.
Please do not over tighten the hot-end screws as you could damage the hot-end

Leapfrog Step 3: Tightening the left hot end
- Make sure the left hot-end is dropped slightly (±1mm) lower then the right hot-end and tighten the corresponding screw (2Nm)
Please do not over tighten the hot-end screws as you could damage the hot-end

Leapfrog Step 4: Bringing the bed to it's most upper position (Z0 position)
- Switch the machine on
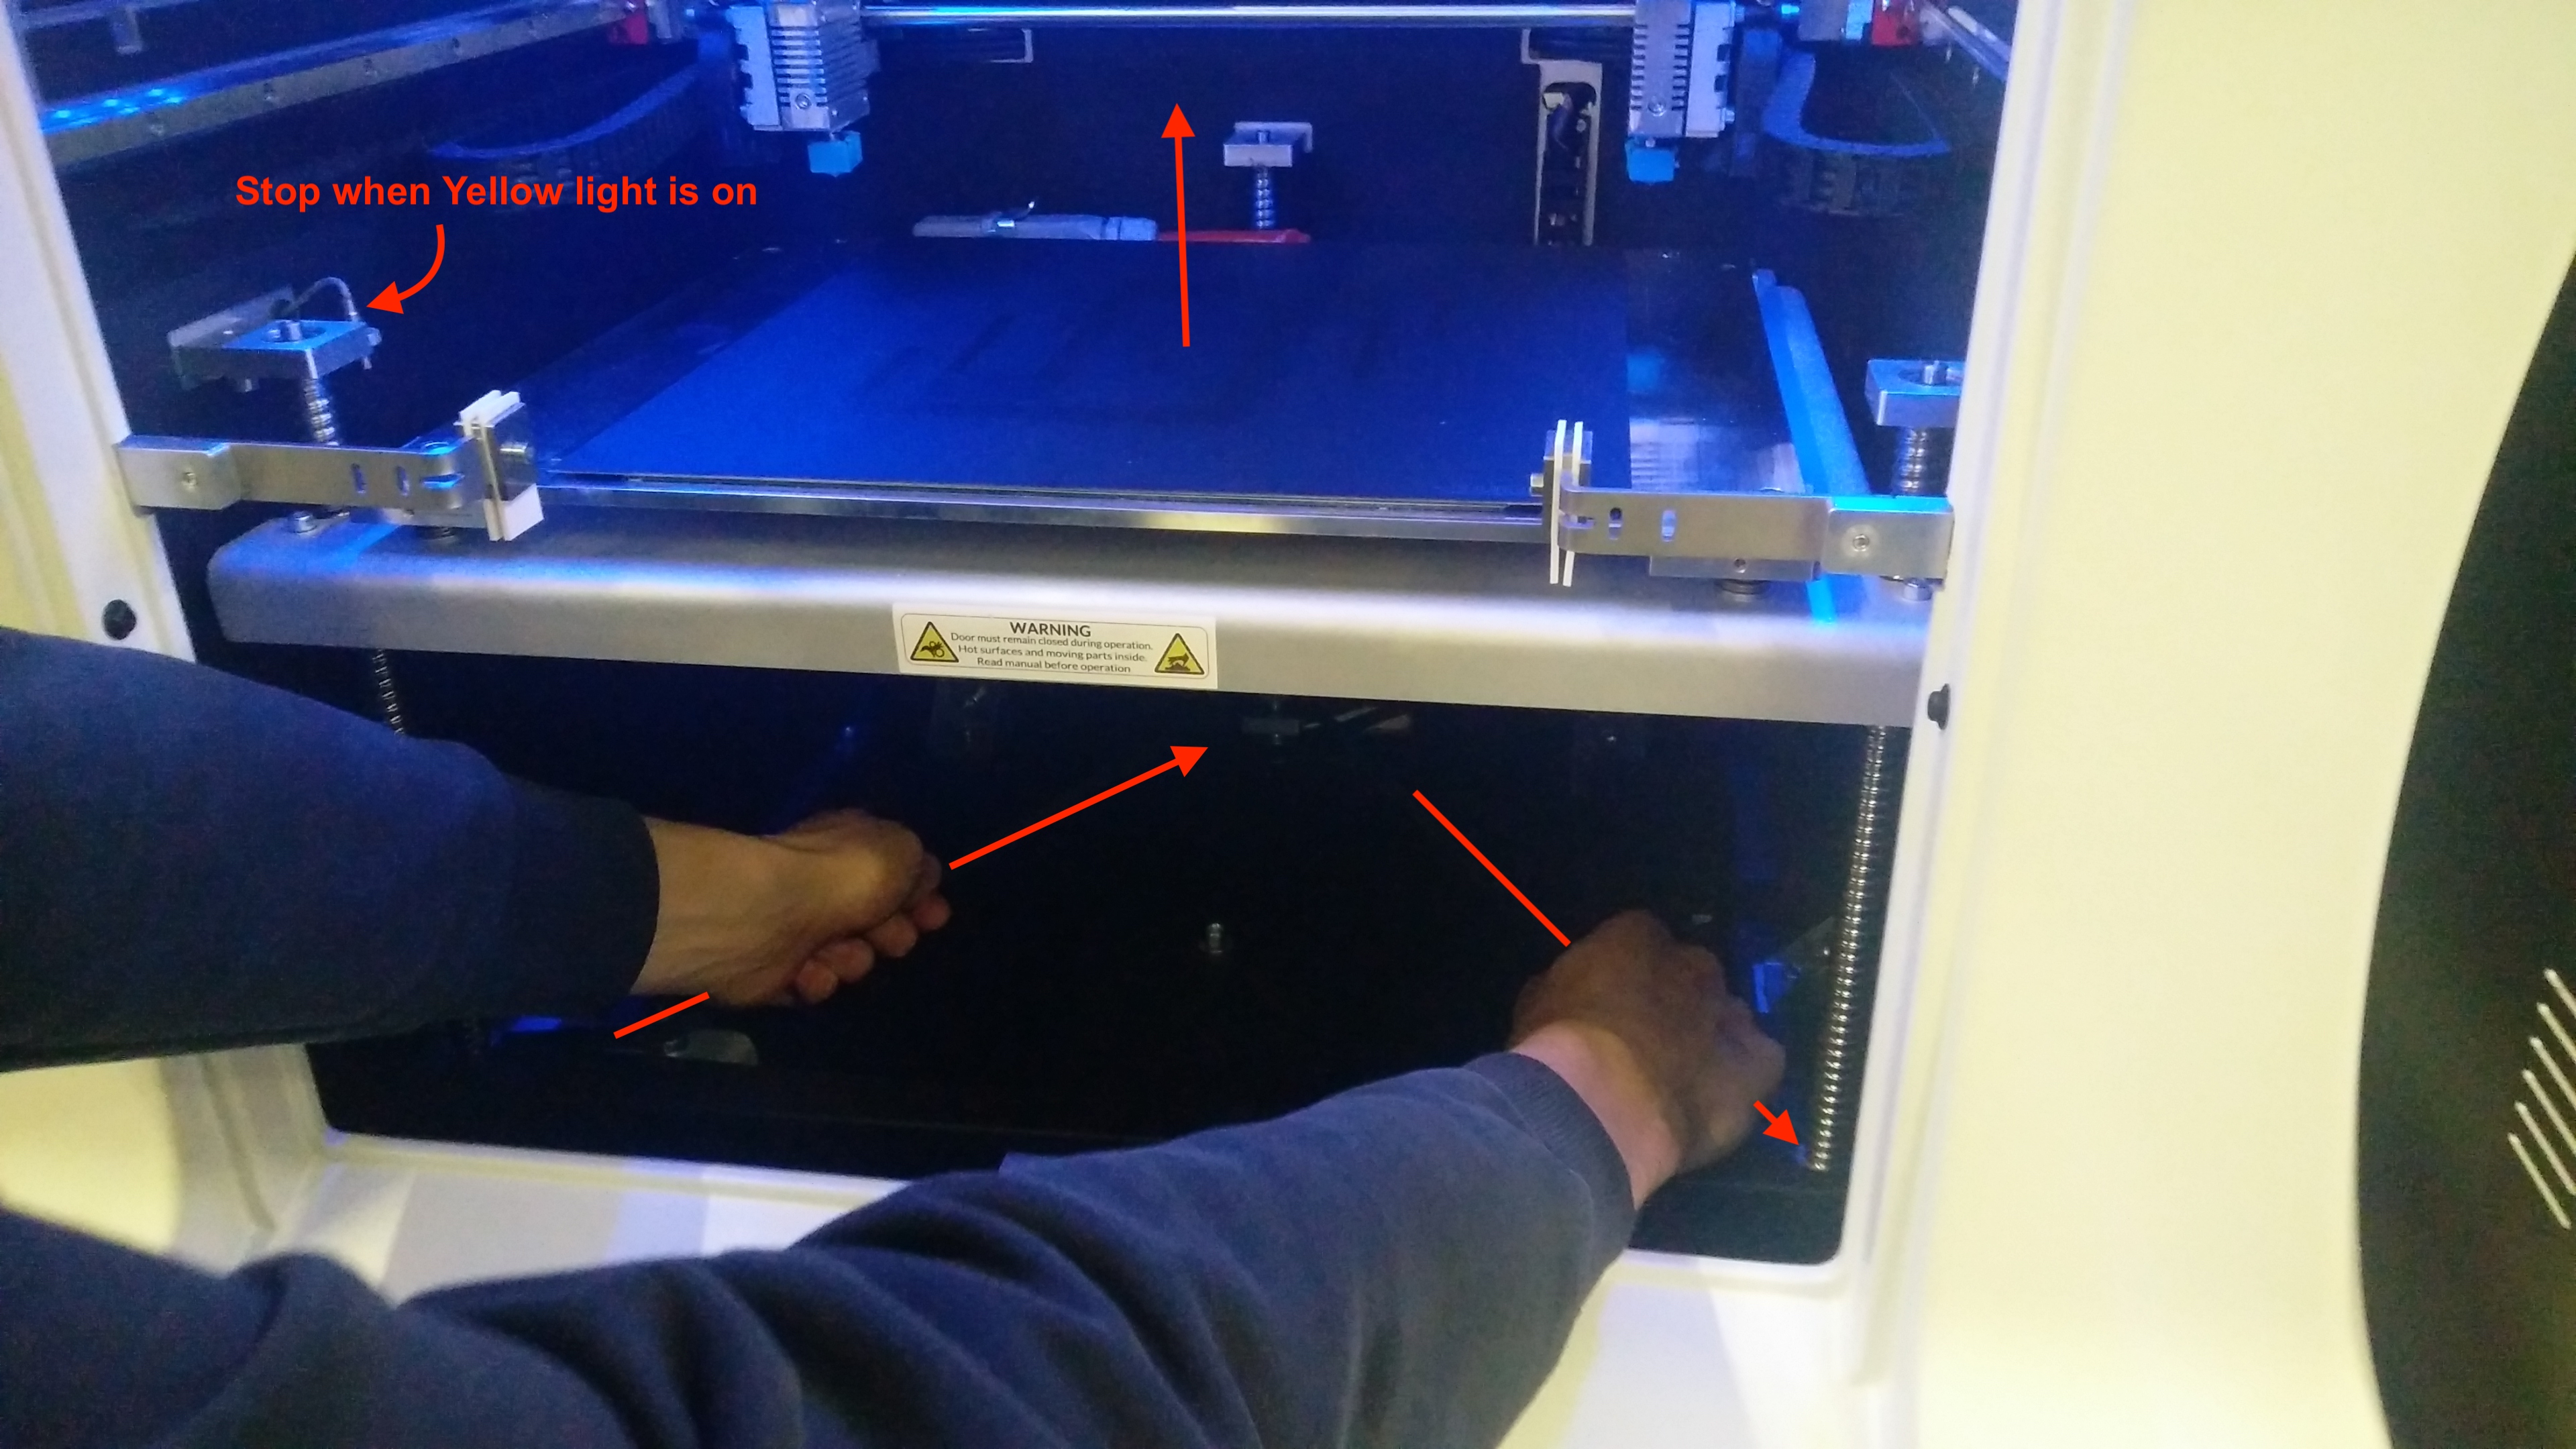
- Make the bed move upwards by moving the Z-belt just until the yellow light turns on, indicating that the most upward position (Z0) has been reached. During all next steps, make sure this position does not change.
Please doo not move any further upwards, as soon as the light is on. The image below illustrates where the yellow light is located.
Leapfrog Step 5:
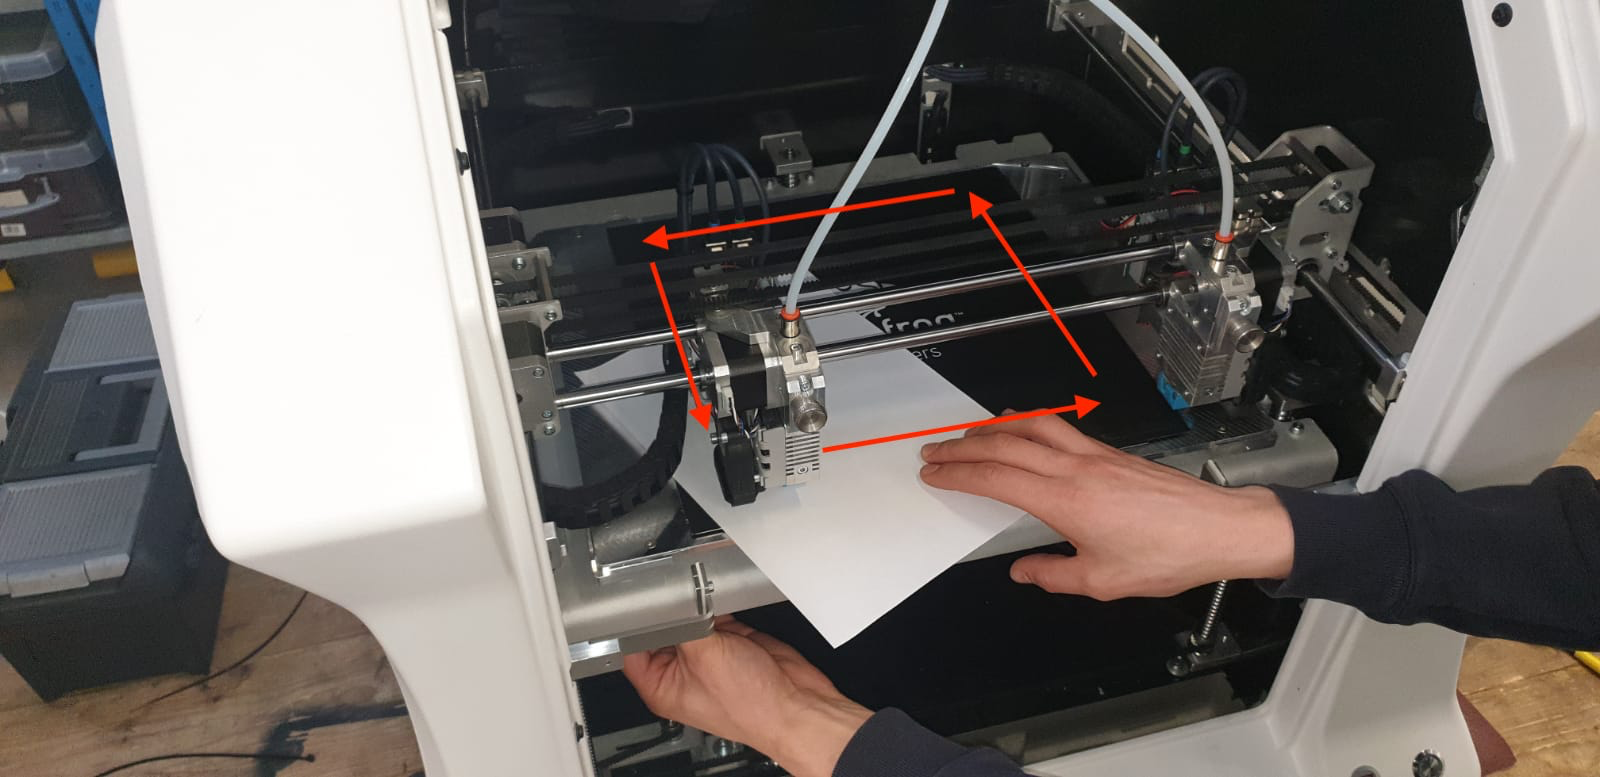
- By rotating the four knobs underneath the bed plate, ensure that the bed and nozzle apply a equal amount of light-friction on the (A4) paper. Repeat this sequence atleast 3 rounds or until no adjustments are needed anymore when going from corner to corner.
Leapfrog Step 6:
- Bring both printheads together to the front middle. Both nozzles should be hovering over the A4 paper and bed plate.

Leapfrog Step 7:
- Loosen the right hot-end
- Gently push the right hot-end down so it sits on the A4 paper.
- Tighten the right hot-end by tightening the corresponding screw (2Nm).
Please do not over tighten the hot-end screws as you could damage the hot-end
- At this stage, both nozzles should be applying equal force (light friction) on the paper

Leapfrog Step 8:
- All calibration steps have now been completed. If you are interested in receiving a demo gcode, please get in touch with our support team.